This blog post covers step-by step instructions on how to create a folder that can be shared between multiple users without being publicly findable (i.e. users will have to share a URL with people who they want to be able to access it).
The location of this folder is under the "My Reports" folder for the individual user.
Start "Internet Explorer" with an account which has administrative permissions for the particular SQL Server Reporting Services (SSRS) instance you are wanting to work with and navigate to your report server URL (for this know let's assume I'm using a server called "reportserver" which is setup on the standard ports);
http://reportserver/Reports/Pages/Folder.aspx
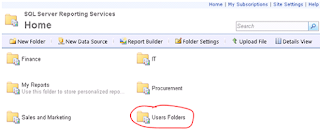 |
| SSRS Home Page - Highlighting "Users Folder" |
Click on the “Users Folders” folder;
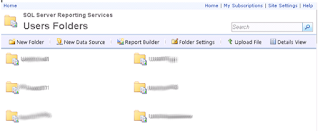 |
| SSRS Contents of the Users Folder |
Find the users folder (look for their username) and click on it. The format of the folders is DOMAIN
USERNAME;
 |
| Highlighting the "My Reports" Folder Under An Individual User |
(under the users folder) Click on “My Reports”;
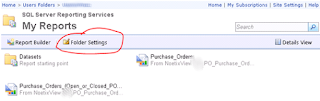 |
| Highlighting "Folder Settings" In A Users "My Reports" Folder |
Click on “Folder Settings” in the title bar;
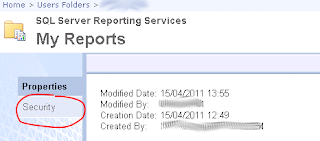 |
| Highlighting "Security" Under Folder Settings |
Click on “Security”;
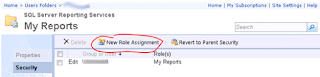 |
| Highlighting "New Role Assignment" |
Click on “New Role Assignment”;
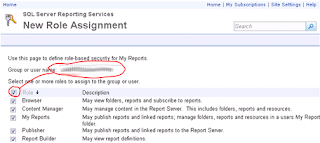 |
| Highlighting the "Select all" click-box |
Enter the administrator or administrator domain group and use the checkbox to select all the roles. This will allow the administrator to directly administer the folder going forward. Scroll to the bottom and click “OK”.
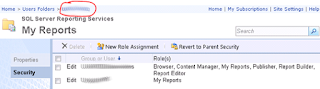 |
| Highlighting the Users' User name |
Click on the username at the top left of the web page;
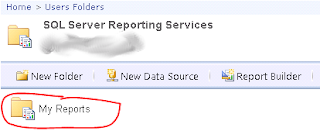 |
| Highlighting The Users "My reports" Folder |
Click on “My Reports” ;
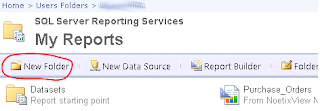 |
| Highlighting the "New Folder" Menu Button |
Click on “New Folder”;
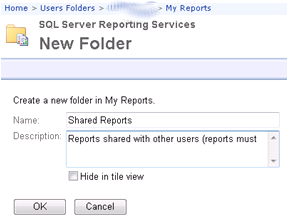 |
| "New Folder" Detail Page |
Enter the name “Shared Reports “ and copy/ paste the following text (in italics) into the description;
To share a report modify the following URL http://reportserver/Reports/Pages/Report.aspx?ItemPath=%2fUsers+Folders%2f%YOURDOMAIN%+%USERNAME%%2fMy+Reports%2fShared+Reports%
Replacing %YOURDOMAIN% with your domain name, %USERNAME% with your username, and with the name of the report you wish to share.
For example to share the report “Supplier Spend Summary” for user DDX7 from domain GB1 you would need to use the URL;
http://reportserver/Reports/Pages/Report.aspx?ItemPath=%2fUsers+Folders%2fGB1+ddx7%2fMy+Reports%2fShared+Reports%Supplier Spend Summary
NOTE: Replace %USERNAME% with the lowercase version of the users windows username and make sure you don’t get carried away removing %’s!!Click "OK";
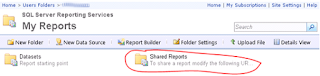 |
| Highlighting the "Shared Reports" Folder |
Click on the newly created “Shared Reports” folder;
 |
| Highlighting "Folder Settings" |
Click on the “Folder Settings” button the titlebar;
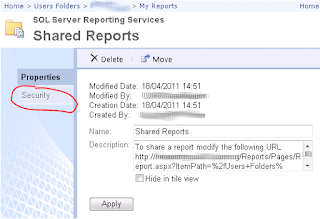 |
| Highlighting "Security" Under Folder Settings |
Click on “Security” on the left;
 |
| "Edit Item Security" Highlighted |
Click on “Edit Item Security”;
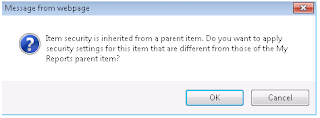 |
| Breaking Item Inheritance Warning Message |
Click “OK”;
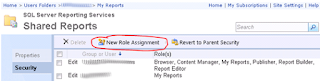 |
| "New Role Assignment" Highlighted |
Click on “New Role Assignment”;
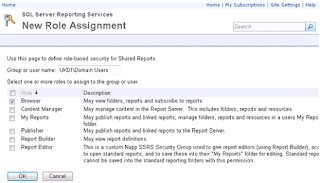 |
| "New Role Assignment" Role Selection Dialog |
You will either to enter individual users (one at a time, repeating the steps above) or enter a group (for example “Domain Users” to include everyone on your domain) and click on the Browser role. Click “OK”;
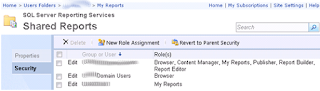 |
| Final Settings |
The setup is now complete. All the users to whom you have assigned the browse role will now be able to access reports in the users "Shared Folder" (once they have the URL).


No comments:
Post a Comment